Getting Started
> Build, deploy, and manage APIs visually -- without writing code.
Brickr is a visual API builder that lets you create fully functional backend services using a node-based editor. Connect visual blocks to define your API logic, manage databases, handle forms, store files, and integrate with third-party services.
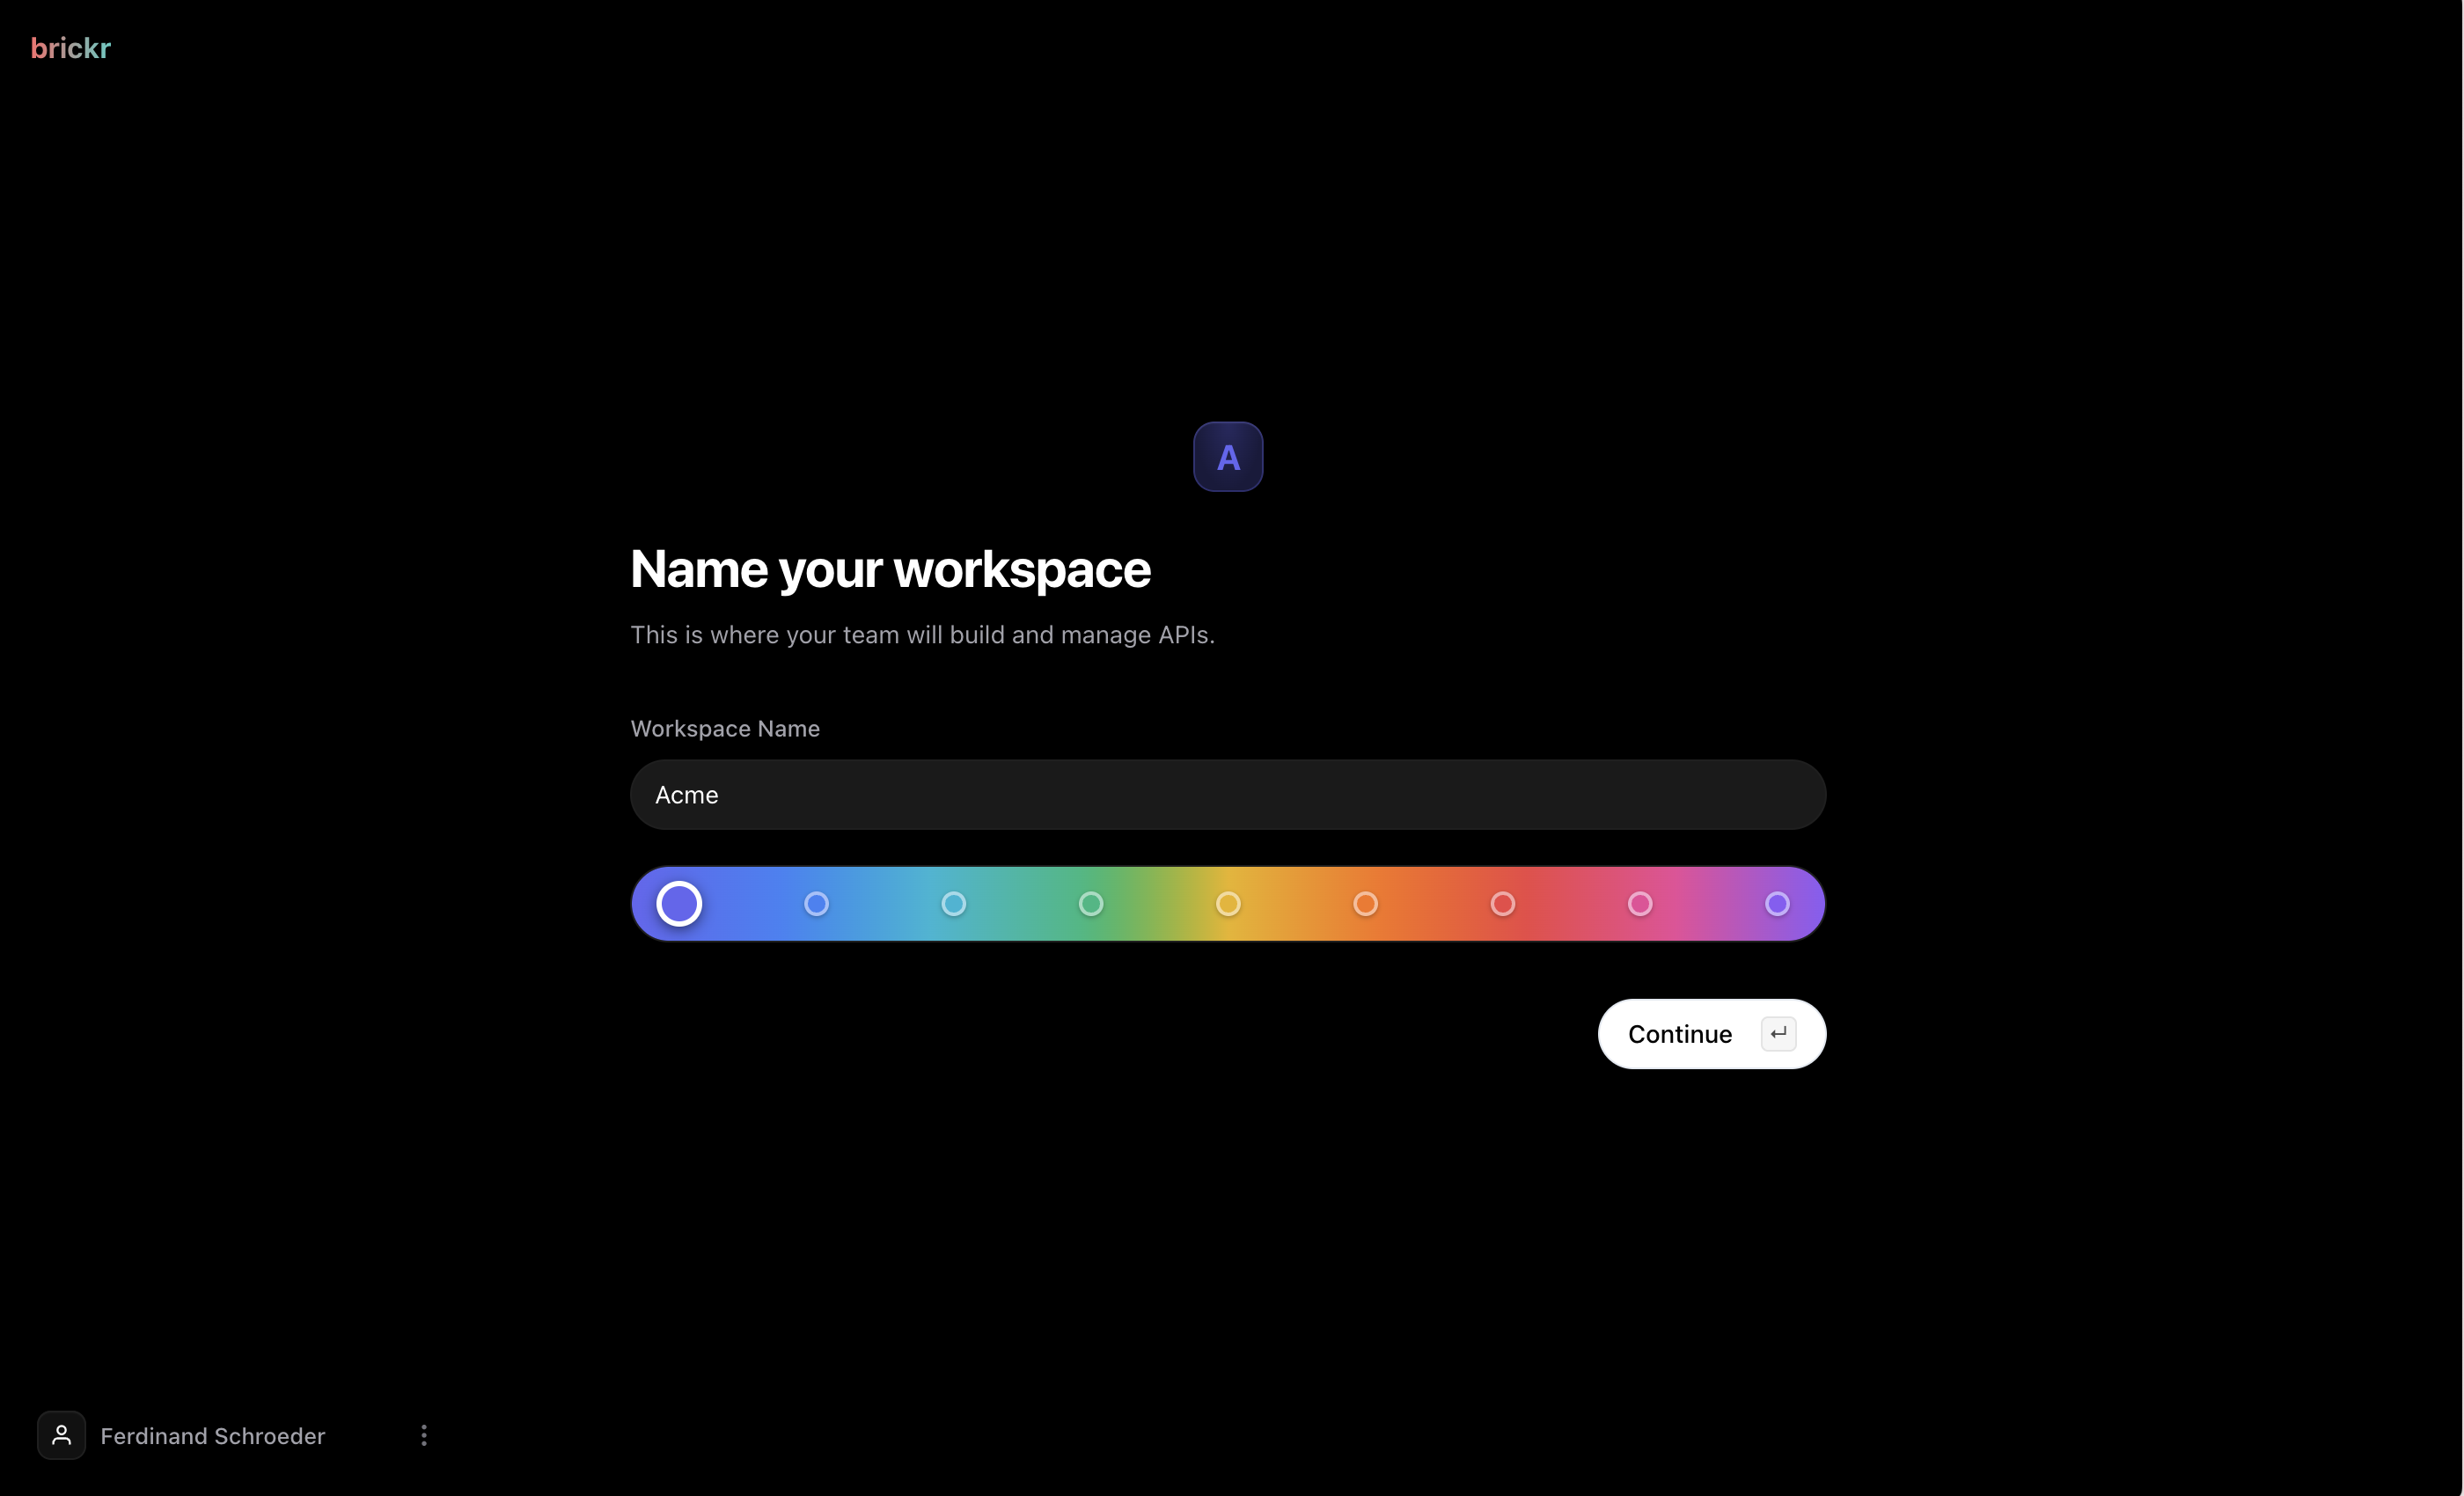
Create your workspace
After signing up, you will be prompted to create a workspace. A workspace is your project environment -- it contains all your APIs, databases, forms, and storage.
1. Go to the Dashboard after signing in. 2. If this is your first time, the onboarding wizard will guide you through creating your workspace. 3. Choose a name for your workspace.
Each workspace has its own settings, members, and resources. You can invite team members to collaborate on your workspace.
Create your first API
An api is a group of routes under a shared base path.
1. Navigate to Dashboard > APIs. 2. Click Create API. 3. Enter a name and base path (e.g., /my-api). 4. Your API is now ready. Click on it to start adding routes.
Build a route
A route is a single API endpoint. Each route has:
- An HTTP method (GET, POST, PUT, DELETE)
- A URL path (e.g.,
/usersor/users/:id) - A flow of nodes that define what happens when the route is called
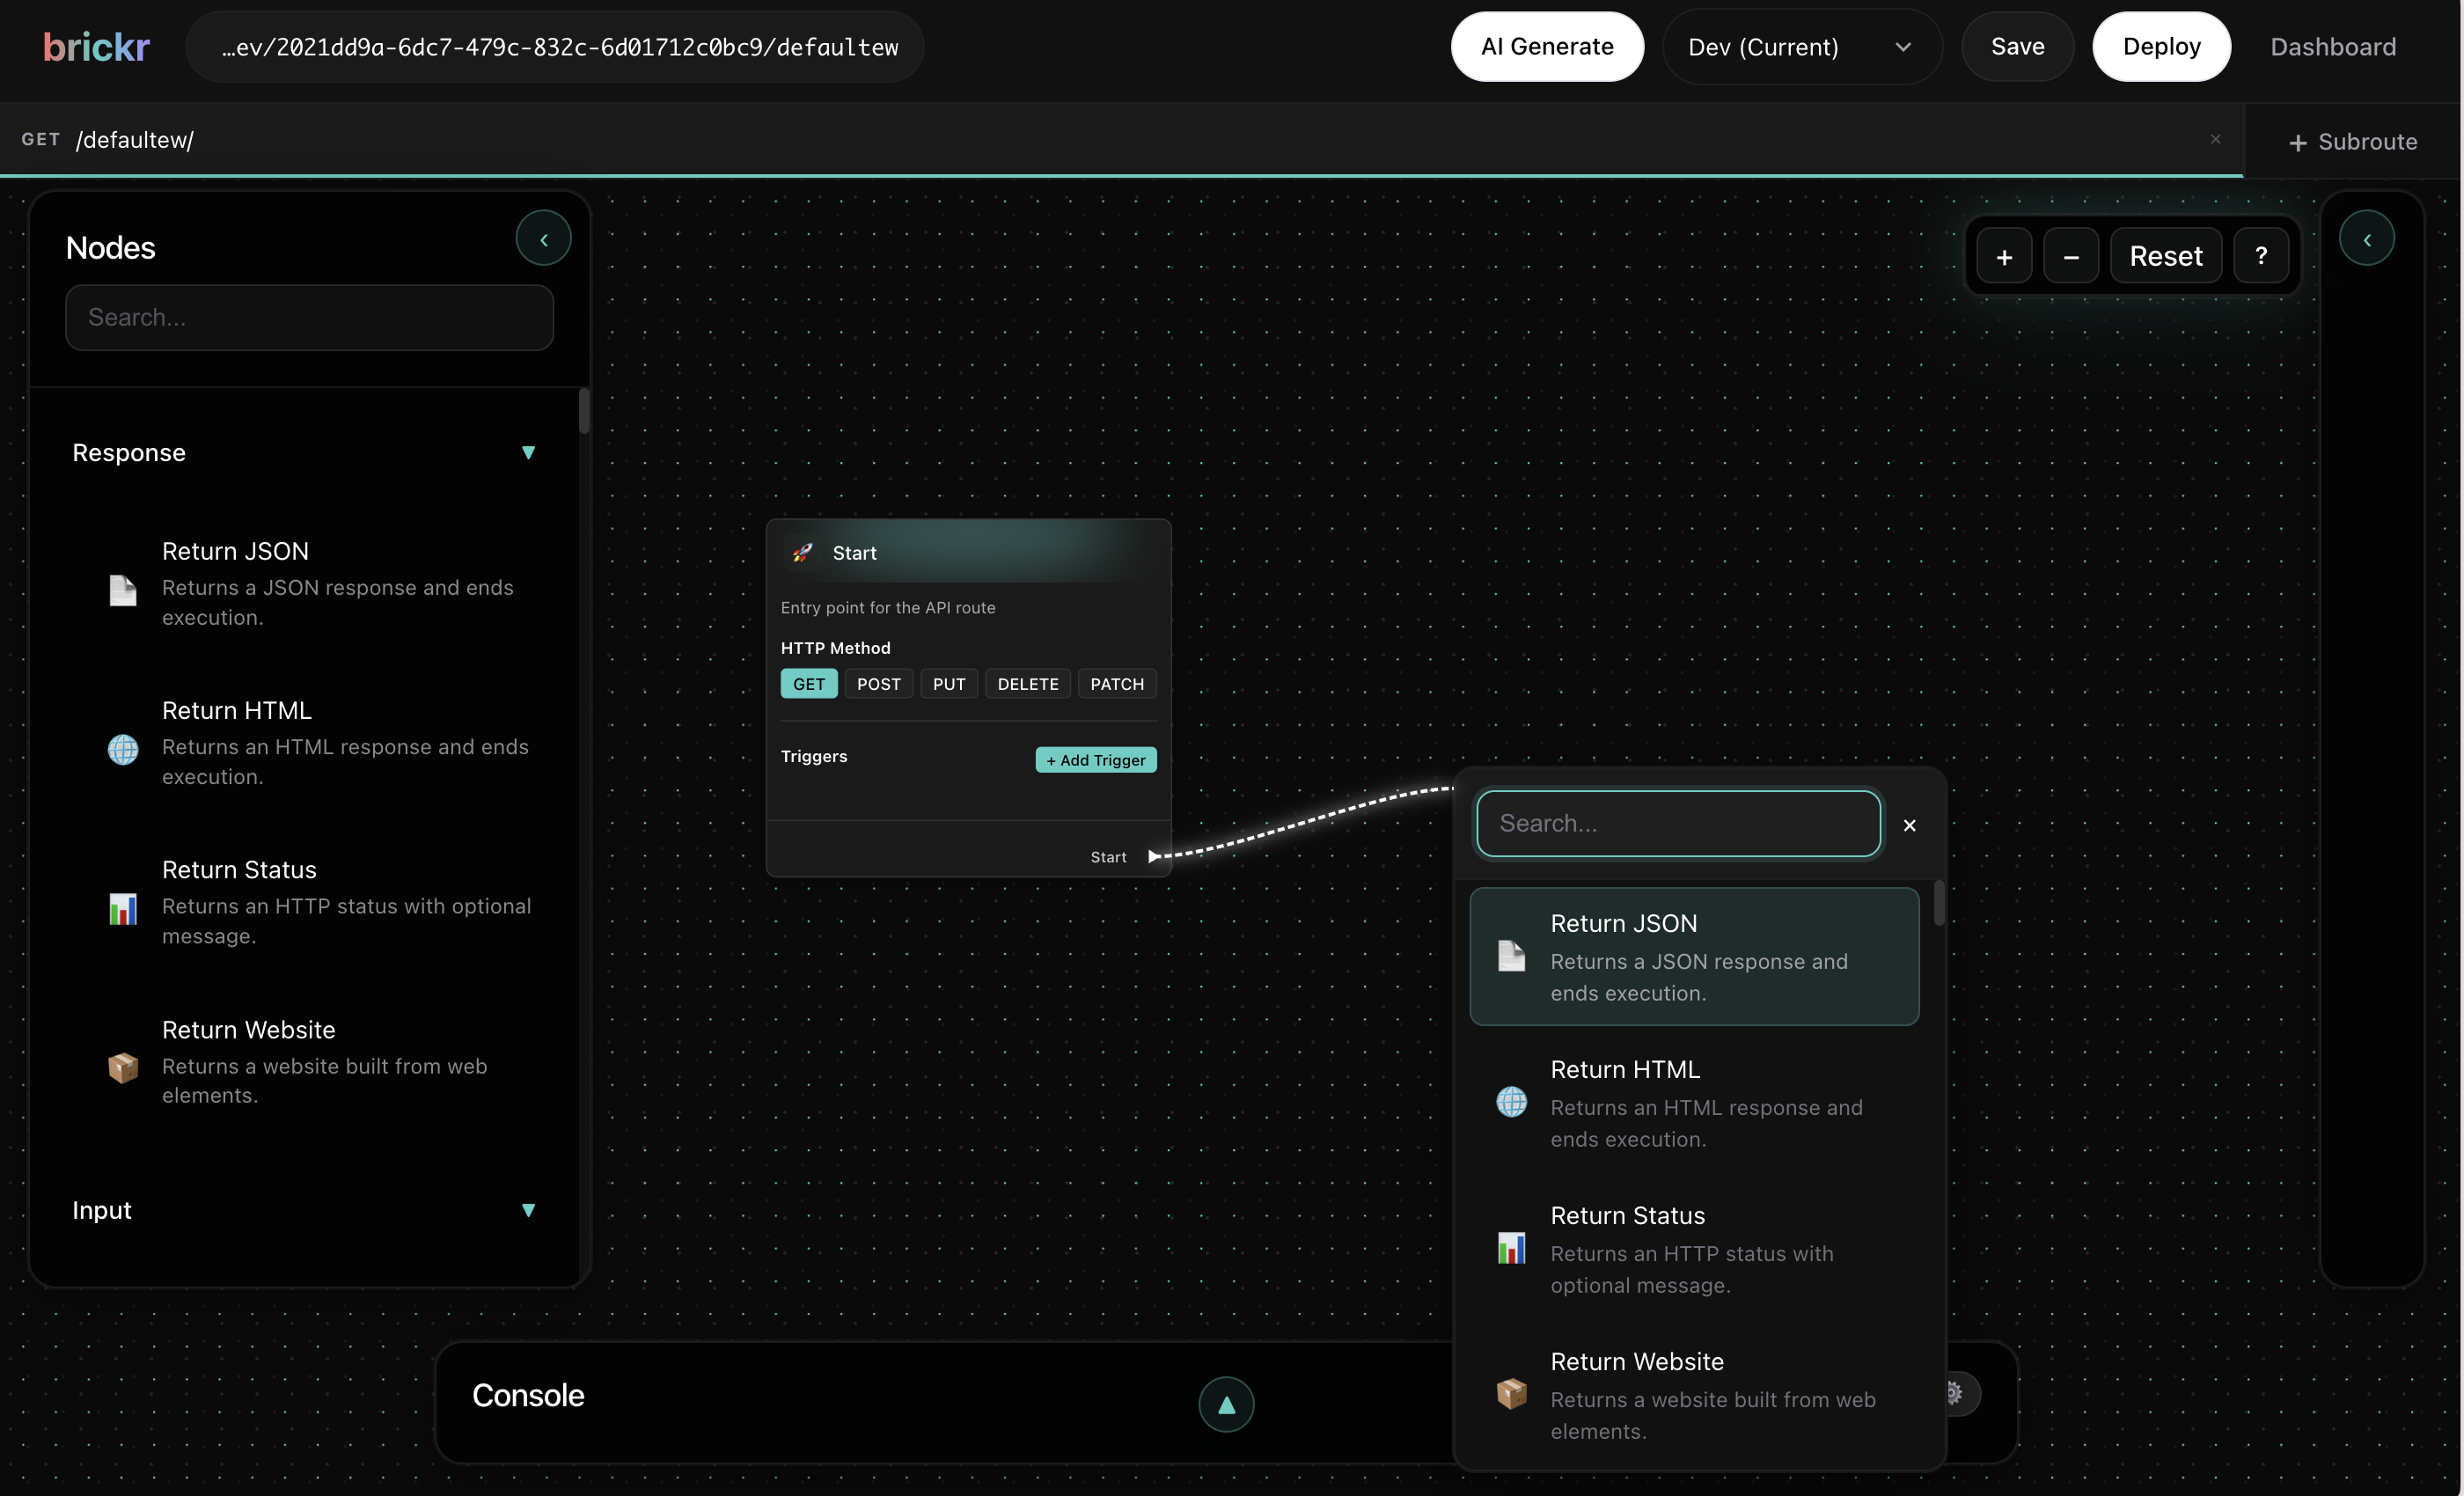
Open the Builder
1. Click on any route to open the Builder. 2. You will see a canvas with a Start Node -- this is where execution begins. 3. Drag from the Start Node's sequence output to add your first node.
Add nodes
Open the quick menu by dragging from any pin or by right-clicking the canvas.
- Drag from an output pin -- the menu shows only compatible nodes.
- Right-click the canvas -- the menu shows all available nodes.
Connect nodes together by dragging wires between matching pins. The type system ensures only compatible connections are allowed.
!Simple connected flow in Builder
The wire color matches the data type. See the Type System for the current legend.
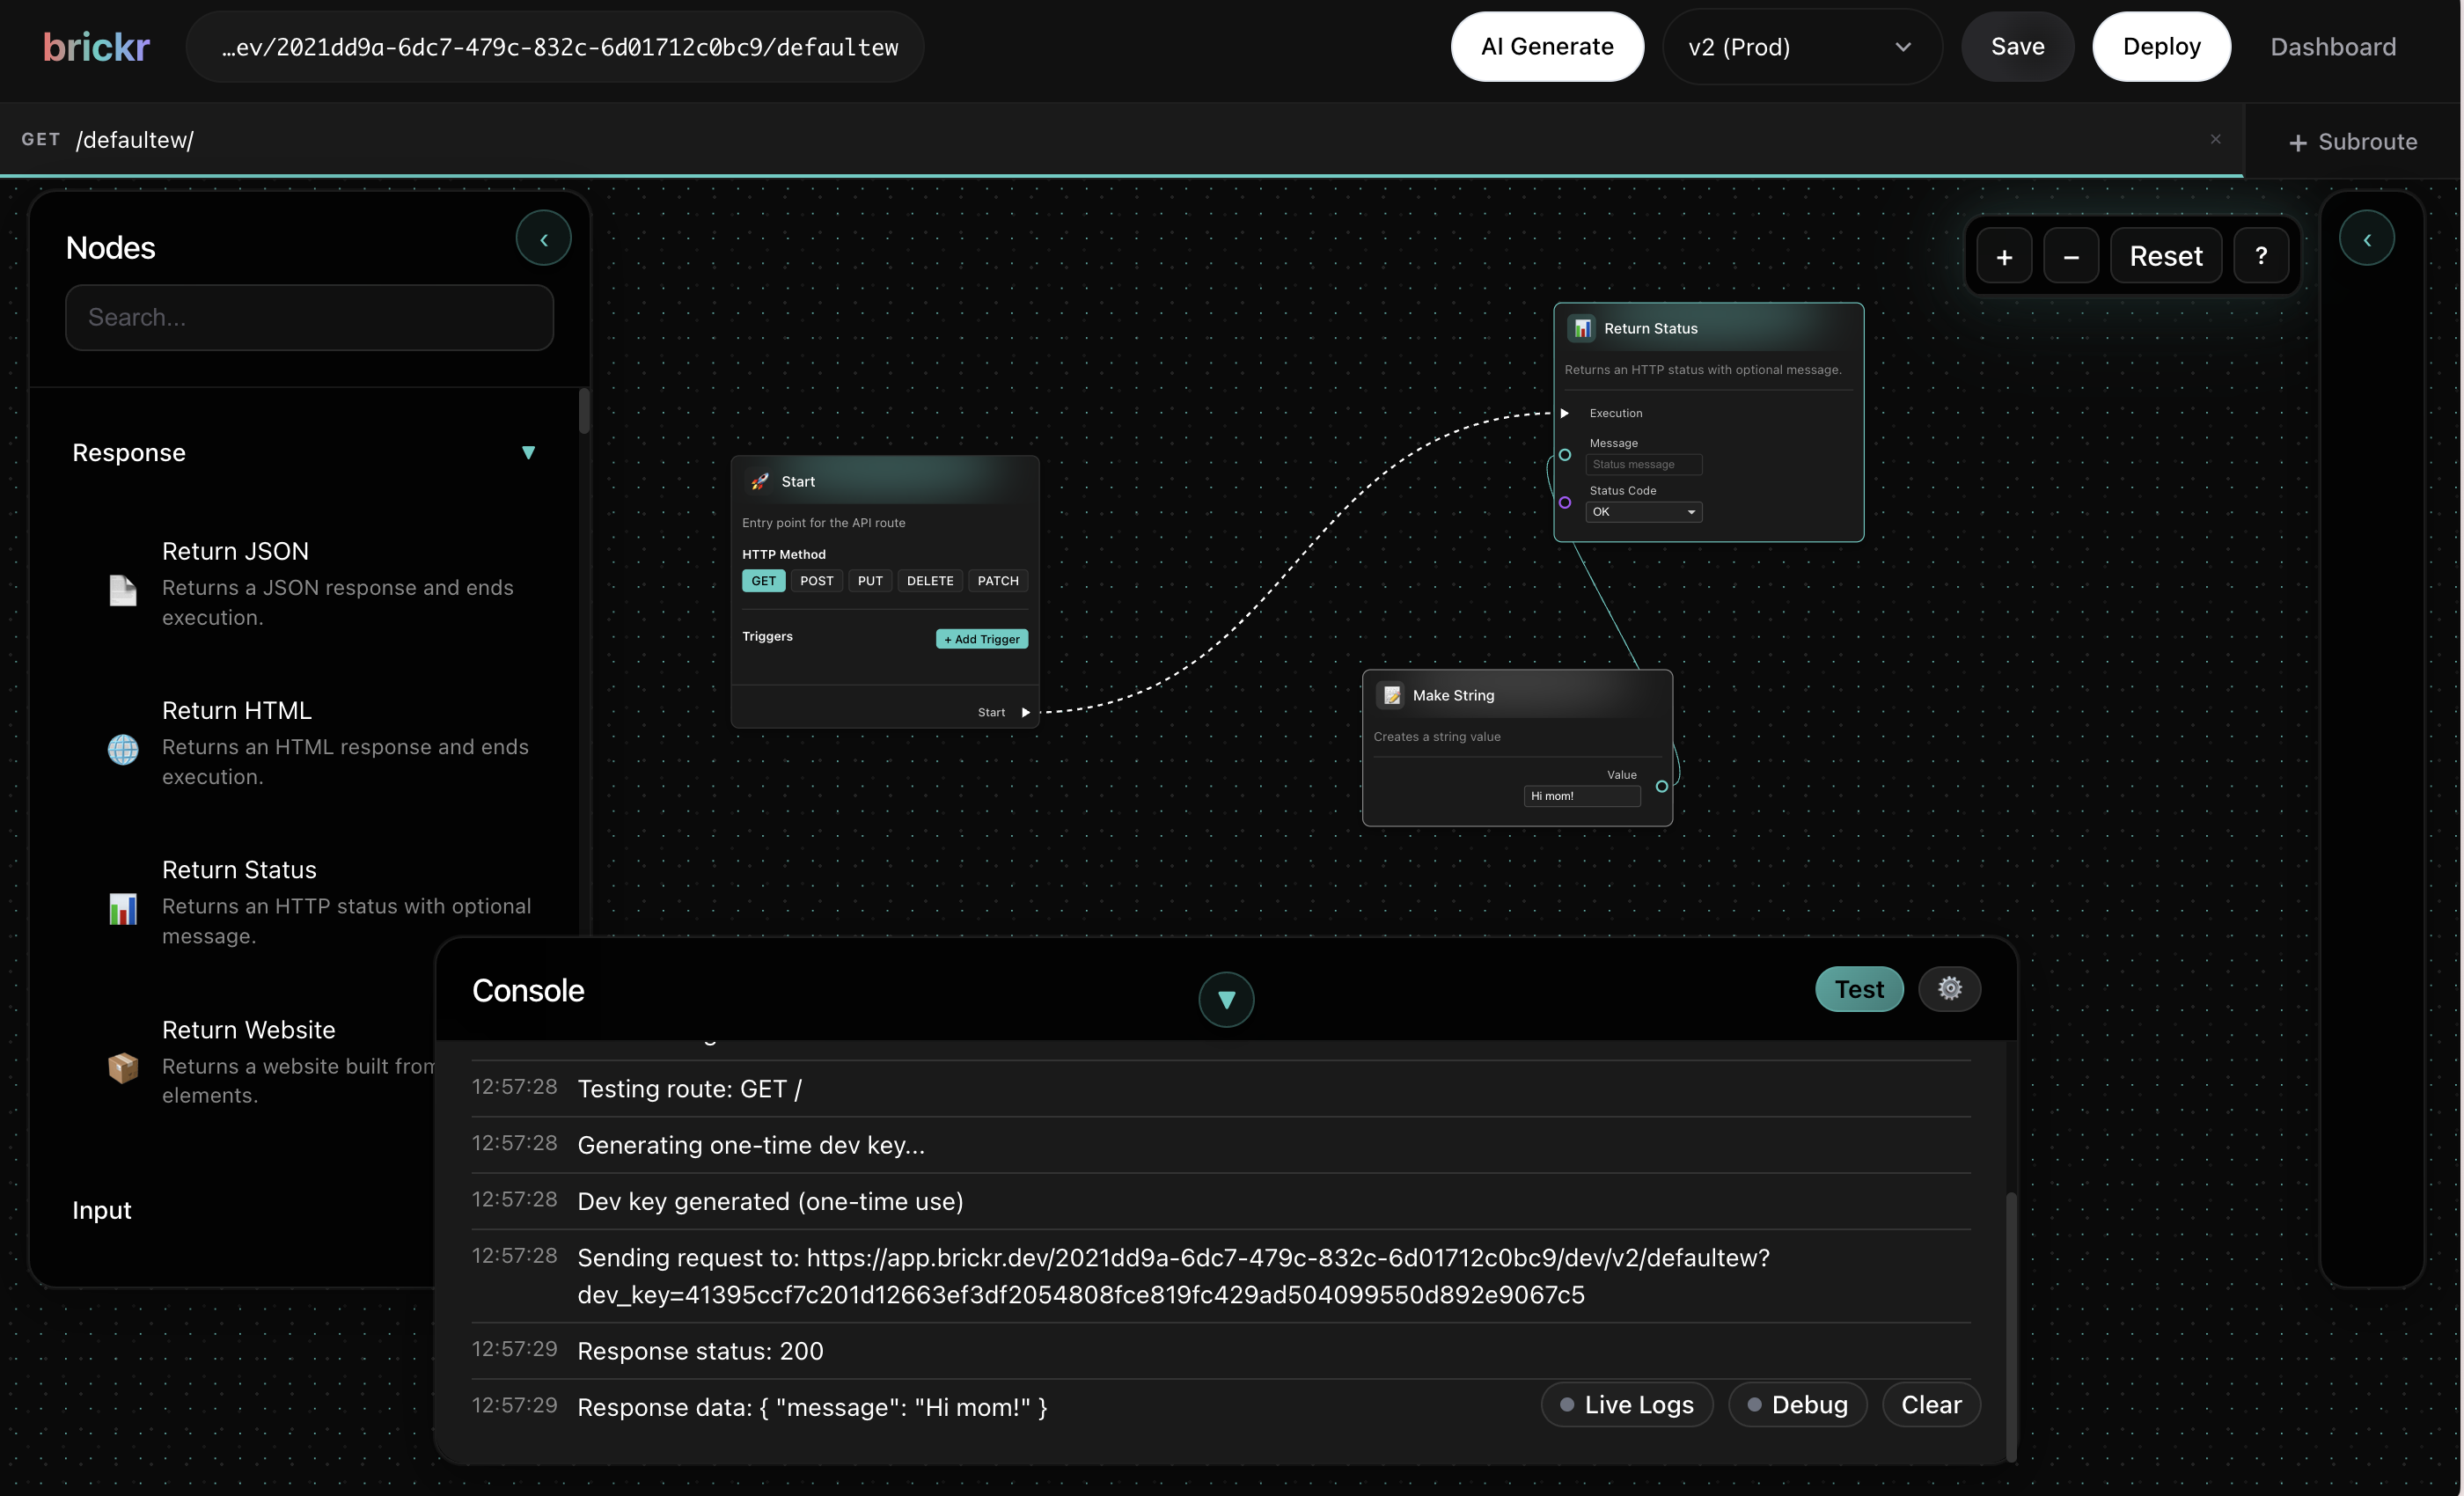
Test your API
Once your route has at least one node connected:
1. Click Save in the builder toolbar. 2. Click Deploy to publish your route. 3. Your API is now live at https://app.brickr.dev/{workspace-id}/{api-base-path}/{route-path}.
You can test it directly from the browser, using curl, or any HTTP client.
curl https://app.brickr.dev/my-workspace-id/my-api/hello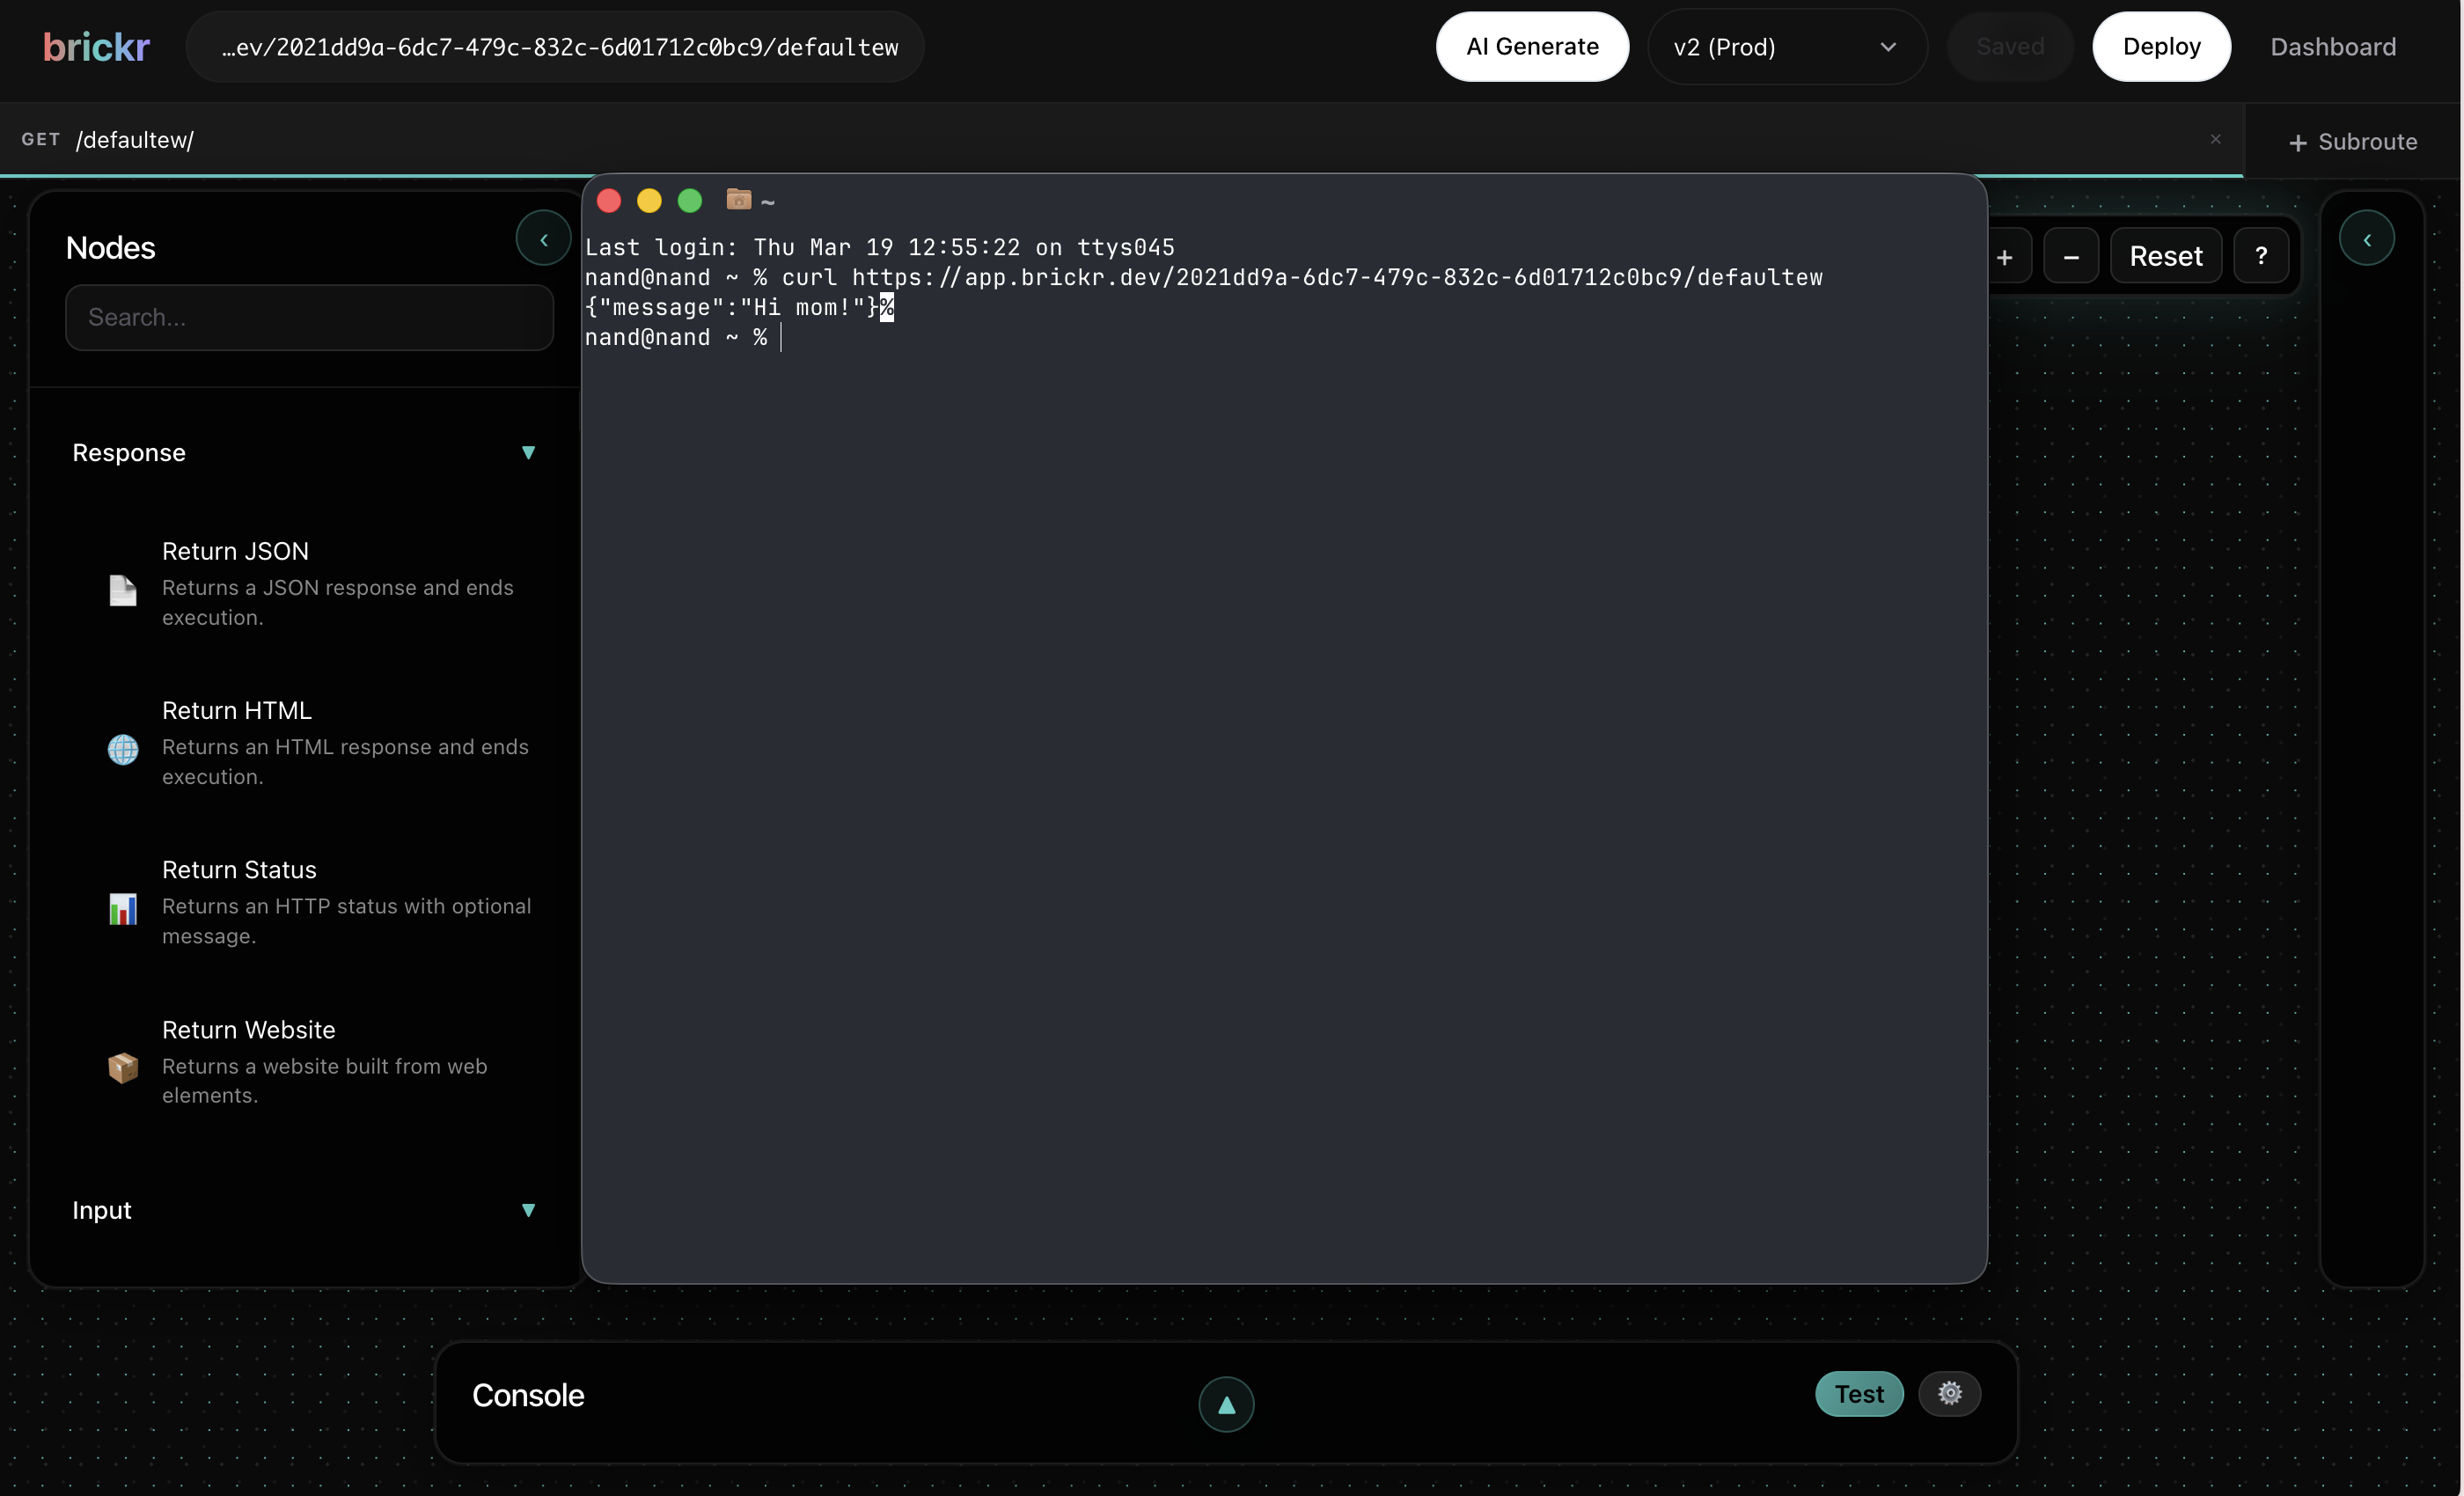
What's next?
| Topic | Description | |-------|-------------| | Builder | Learn the visual editor in depth | | Nodes | Explore the available node categories | | APIs | API creation and configuration | | Forms | Build and manage forms | | Database | Create tables and query data | | Storage | Upload and manage files | | Type System | Understand Brickr's type system |